1.微服务场景模拟 首先,我们需要模拟一个服务调用的场景,搭建两个工程:itcast-service-provider(服务提供方)和itcast-service-consumer(服务调用方)。方便后面学习微服务架构
服务提供方:使用mybatis操作数据库,实现对数据的增删改查;并对外提供rest接口服务。
服务消费方:使用restTemplate远程调用服务提供方的rest接口服务,获取数据。
1.1.服务提供者 我们新建一个项目:itcast-service-provider,对外提供根据id查询用户的服务。
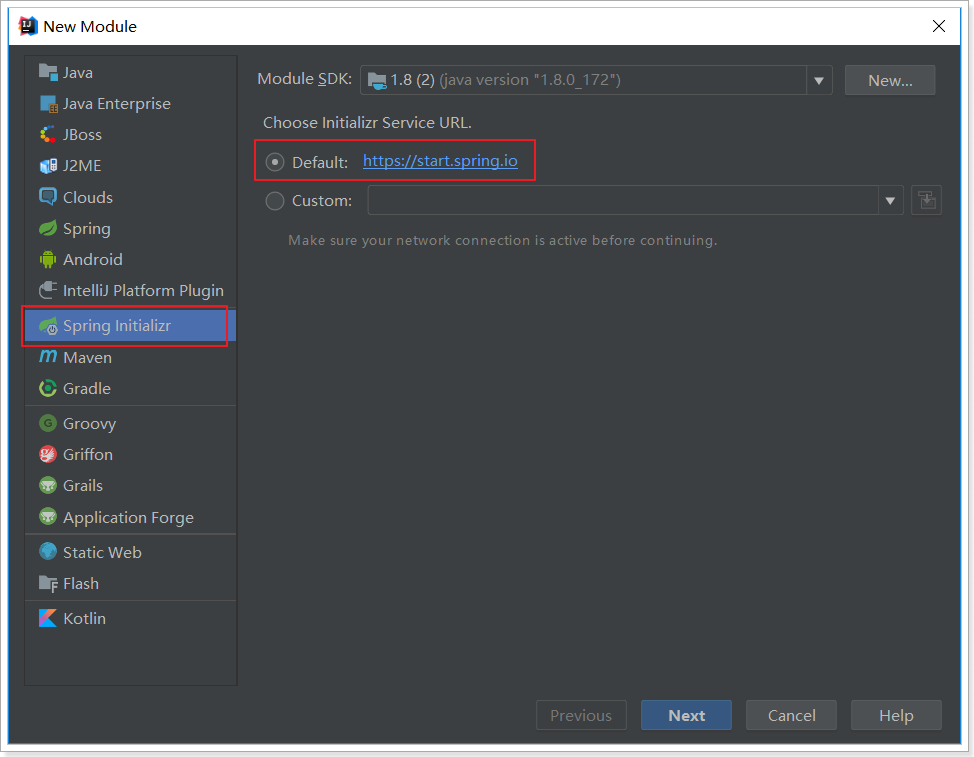
1.1.1.Spring脚手架创建工程 借助于Spring提供的快速搭建工具:
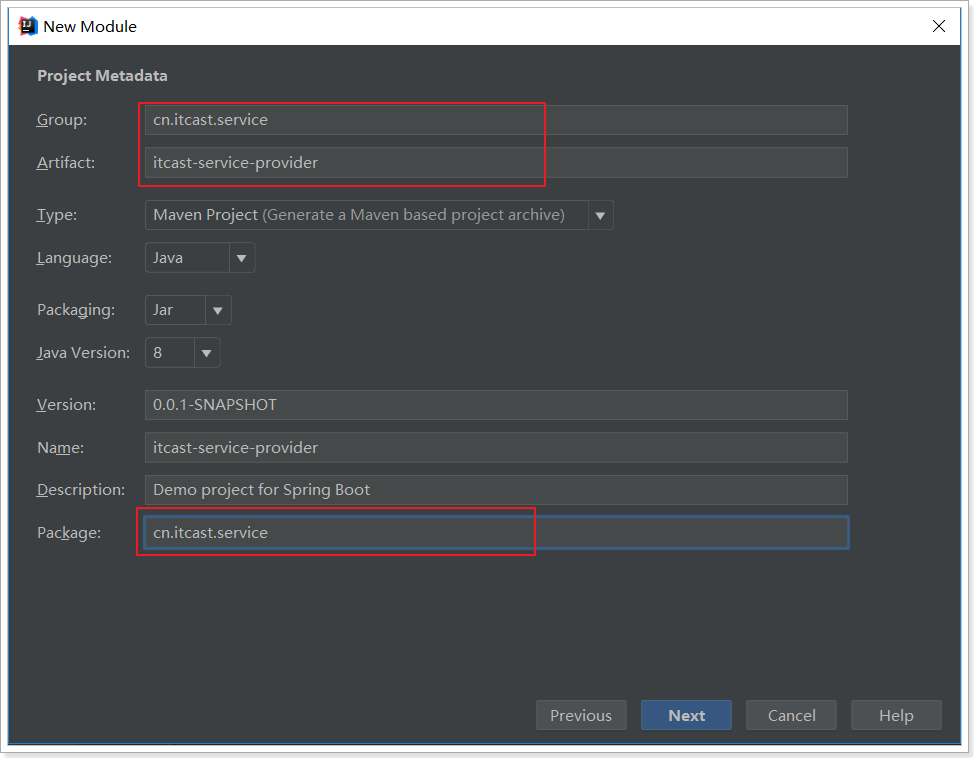
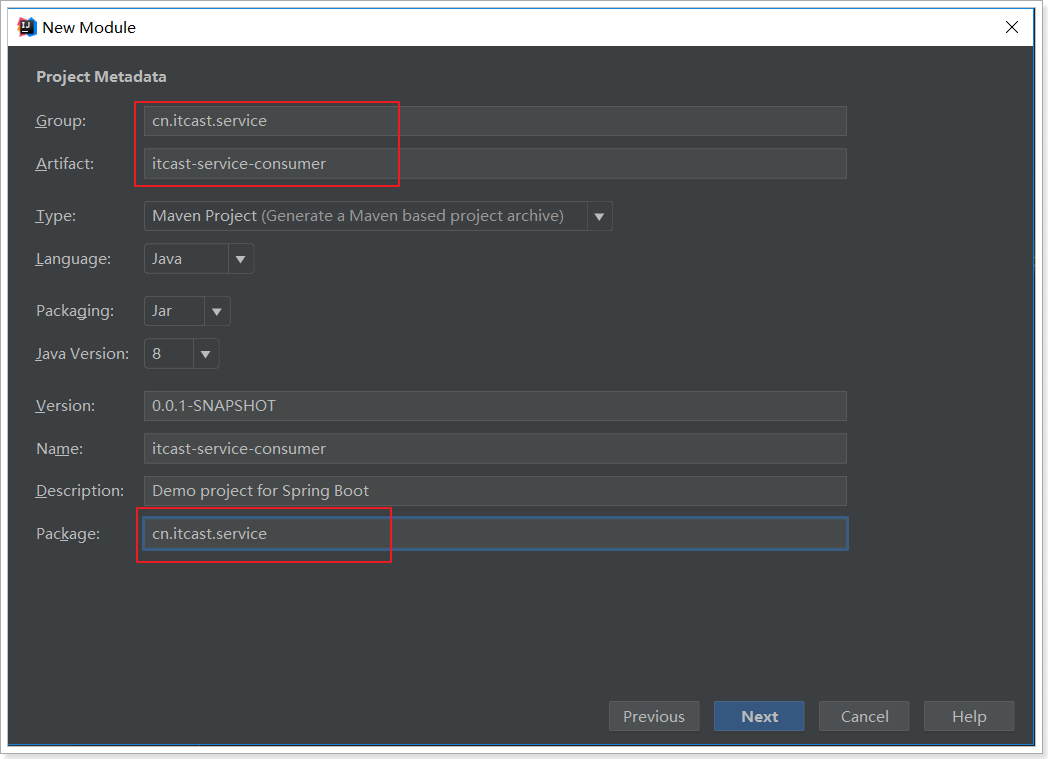
next–>填写项目信息:
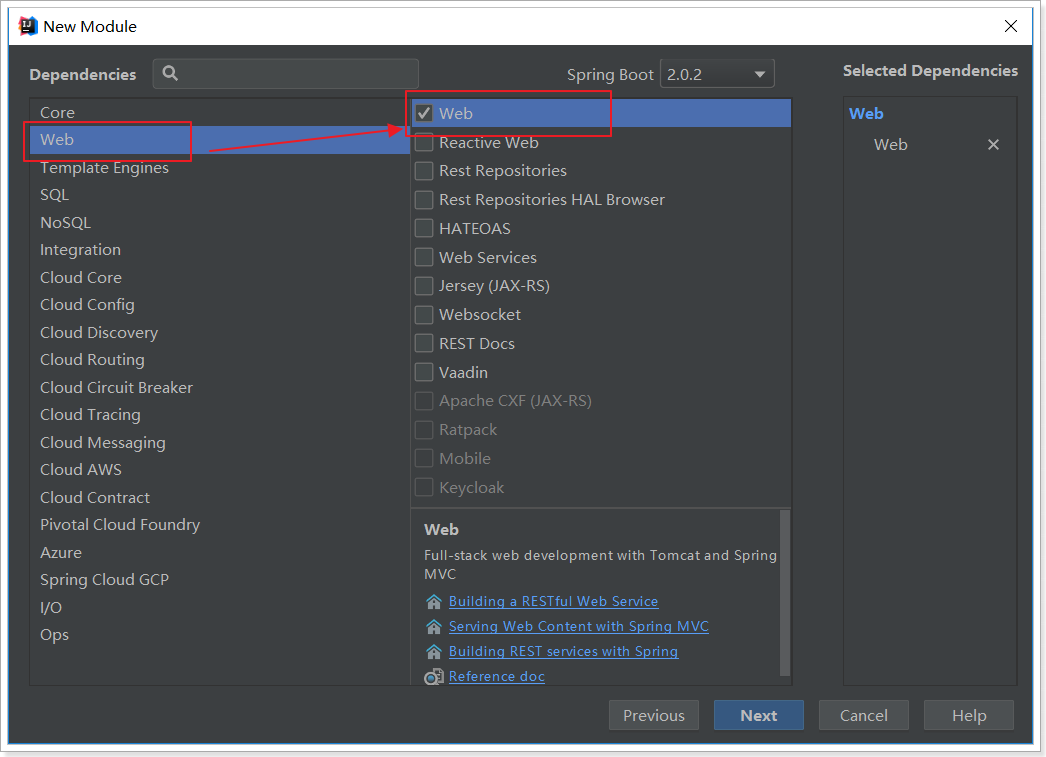
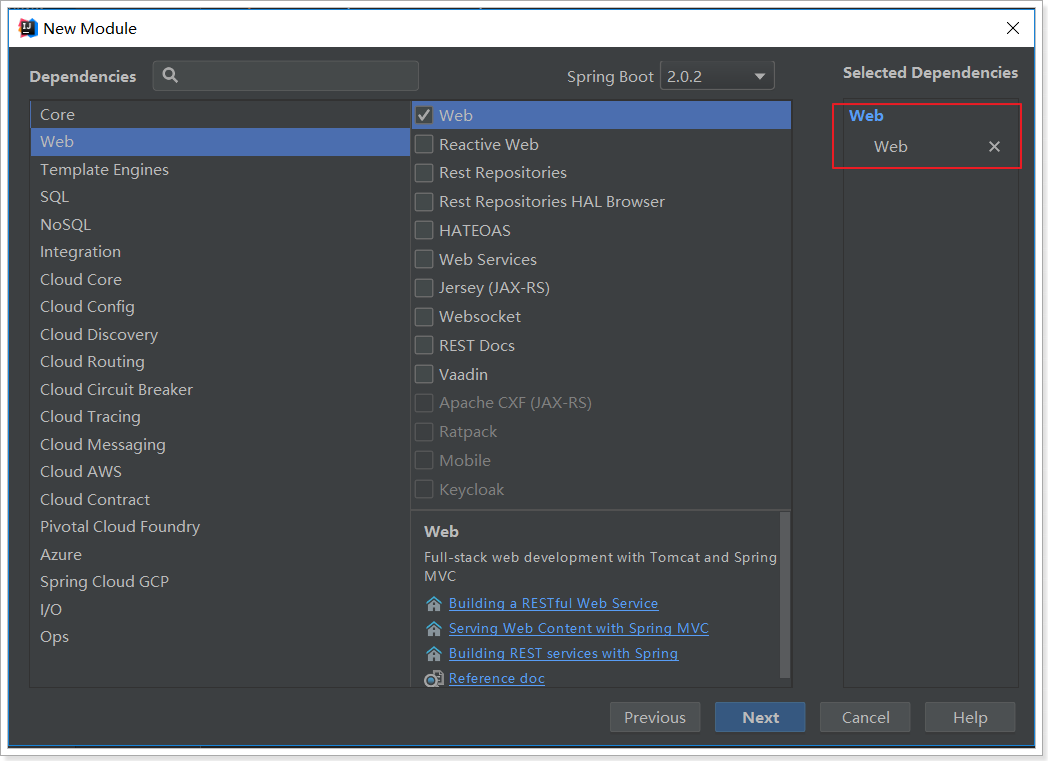
next –> 添加web依赖:
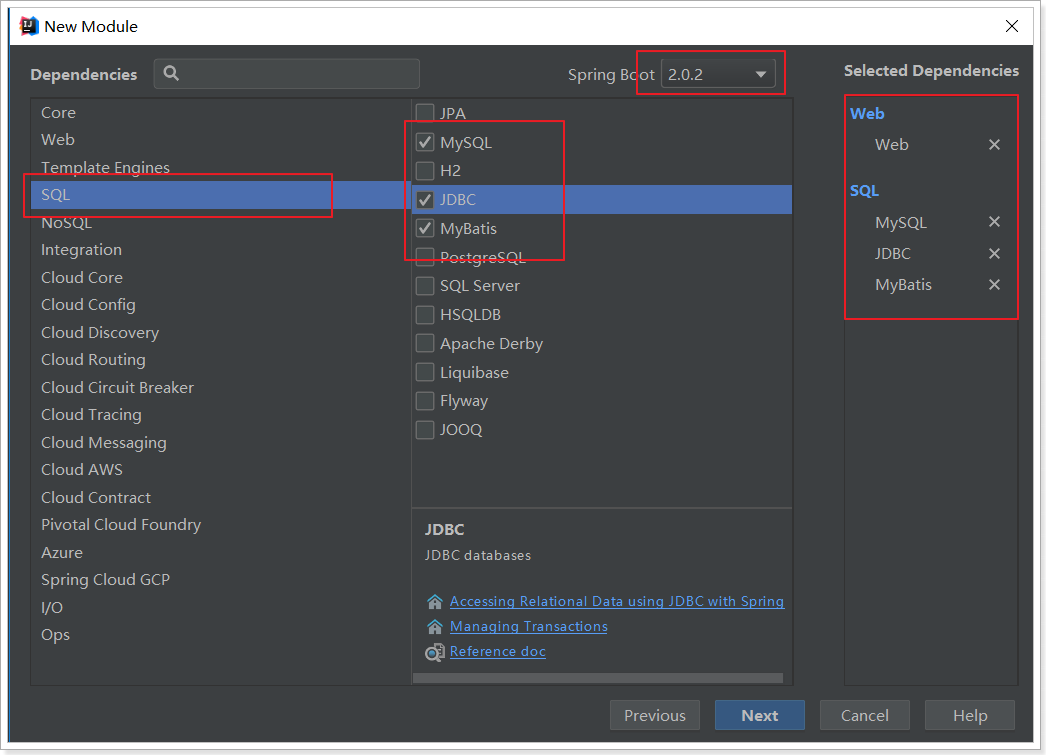
添加mybatis依赖:
Next –> 填写项目位置:
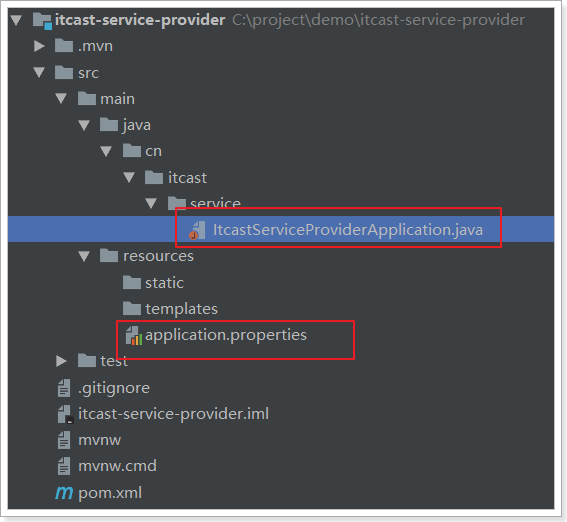
生成的项目结构,已经包含了引导类(itcastServiceProviderApplication):
依赖也已经全部自动引入:
1
2
3
4
5
6
7
8
9
10
11
12
13
14
15
16
17
18
19
20
21
22
23
24
25
26
27
28
29
30
31
32
33
34
35
36
37
38
39
40
41
42
43
44
45
46
47
48
49
50
51
52
53
54
55
56
57
58
59
60
61
62
63
64
65
66
67
68
69
<?xml version="1.0" encoding="UTF-8"?> <project xmlns ="http://maven.apache.org/POM/4.0.0" xmlns:xsi ="http://www.w3.org/2001/XMLSchema-instance" xsi:schemaLocation ="http://maven.apache.org/POM/4.0.0 http://maven.apache.org/xsd/maven-4.0.0.xsd" > <modelVersion > 4.0.0</modelVersion > <groupId > cn.itcast.service</groupId > <artifactId > itcast-service-provider</artifactId > <version > 0.0.1-SNAPSHOT</version > <packaging > jar</packaging > <name > itcast-service-provider</name > <description > Demo project for Spring Boot</description > <parent > <groupId > org.springframework.boot</groupId > <artifactId > spring-boot-starter-parent</artifactId > <version > 2.0.6.RELEASE</version > <relativePath /> </parent > <properties > <project.build.sourceEncoding > UTF-8</project.build.sourceEncoding > <project.reporting.outputEncoding > UTF-8</project.reporting.outputEncoding > <java.version > 1.8</java.version > </properties > <dependencies > <dependency > <groupId > org.springframework.boot</groupId > <artifactId > spring-boot-starter-jdbc</artifactId > </dependency > <dependency > <groupId > org.springframework.boot</groupId > <artifactId > spring-boot-starter-web</artifactId > </dependency > <dependency > <groupId > org.mybatis.spring.boot</groupId > <artifactId > mybatis-spring-boot-starter</artifactId > <version > 1.3.2</version > </dependency > <dependency > <groupId > mysql</groupId > <artifactId > mysql-connector-java</artifactId > <scope > runtime</scope > </dependency > <dependency > <groupId > org.springframework.boot</groupId > <artifactId > spring-boot-starter-test</artifactId > <scope > test</scope > </dependency > <dependency > <groupId > tk.mybatis</groupId > <artifactId > mapper-spring-boot-starter</artifactId > <version > 2.0.4</version > </dependency > </dependencies > <build > <plugins > <plugin > <groupId > org.springframework.boot</groupId > <artifactId > spring-boot-maven-plugin</artifactId > </plugin > </plugins > </build > </project >
当然,因为要使用通用mapper,所以我们需要手动加一条依赖 :
1 2 3 4 5 <dependency > <groupId > tk.mybatis</groupId > <artifactId > mapper-spring-boot-starter</artifactId > <version > 2.0.4</version > </dependency >
非常快捷啊!
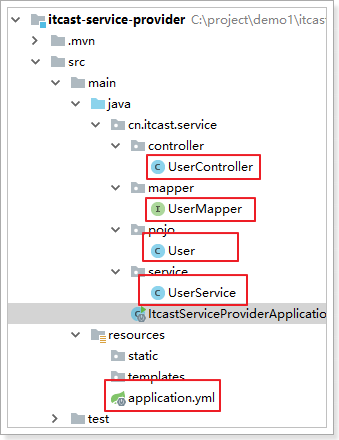
1.1.2.编写代码
1.1.2.1.配置 属性文件,这里我们采用了yaml语法,而不是properties:
1
2
3
4
5
6
7
8
9
server: port: 8081 spring: datasource: url: jdbc:mysql://localhost:3306/mybatis username: root password: root mybatis: type-aliases-package: cn.itcast.service.pojo
1.1.2.2.实体类 1 2 3 4 5 6 7 8 9 10 11 12 13 14 15 16 17 18 19 20 21 22 23 24 25 26 27 28 29 30 31 32 33 34 35 36 37 38 39 40 41 42 43 44 45 46 47 48 49 50 51 52 53 54 55 56 57 58 59 60 61 62 63 64 65 66 67 68 69 70 71 72 73 74 75 76 77 78 79 80 81 82 83 84 85 86 87 88 89 90 91 92 93 94 95 96 97 98 99 100 101 102 103 104 105 @Table (name = "tb_user" )public class User implements Serializable private static final long serialVersionUID = 1L ; @Id @GeneratedValue (strategy = GenerationType.IDENTITY) private Long id; private String userName; private String password; private String name; private Integer age; private Integer sex; private Date birthday; private Date created; private Date updated; public Long getId () return id; } public void setId (Long id) this .id = id; } public String getUserName () return userName; } public void setUserName (String userName) this .userName = userName; } public String getPassword () return password; } public void setPassword (String password) this .password = password; } public String getName () return name; } public void setName (String name) this .name = name; } public Integer getAge () return age; } public void setAge (Integer age) this .age = age; } public Integer getSex () return sex; } public void setSex (Integer sex) this .sex = sex; } public Date getBirthday () return birthday; } public void setBirthday (Date birthday) this .birthday = birthday; } public Date getCreated () return created; } public void setCreated (Date created) this .created = created; } public Date getUpdated () return updated; } public void setUpdated (Date updated) this .updated = updated; } }
1.1.2.3.UserMapper 1 2 3 @Mapper public interface UserMapper extends tk .mybatis .mapper .common .Mapper <User >}
1.1.2.4.UserService 1 2 3 4 5 6 7 8 9 10 @Service public class UserService @Autowired private UserMapper userMapper; public User queryById (Long id) return this .userMapper.selectByPrimaryKey(id); } }
4.1.2.5.UserController 添加一个对外查询的接口:
1 2 3 4 5 6 7 8 9 10 11 12 @RestController @RequestMapping ("user" )public class UserController @Autowired private UserService userService; @GetMapping ("{id}" ) public User queryById (@PathVariable("id" ) Long id) return this .userService.queryById(id); } }
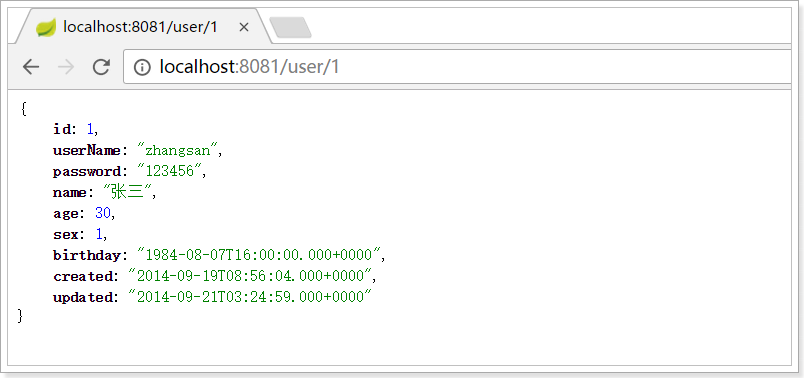
1.1.3.启动并测试 启动项目,访问接口:http://localhost:8081/user/1
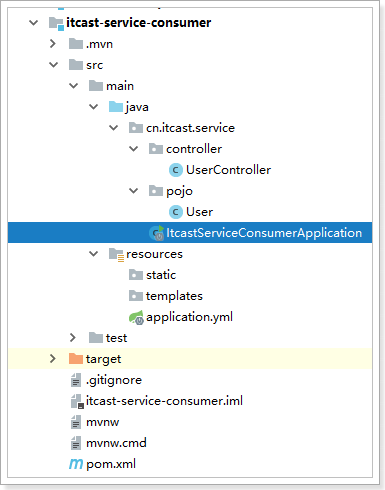
1.2.服务调用者 搭建itcast-service-consumer服务消费方工程。
1.2.1.创建工程 与上面类似,这里不再赘述,需要注意的是,我们调用itcast-service-provider的解耦获取数据,因此不需要mybatis相关依赖了。
pom:
1 2 3 4 5 6 7 8 9 10 11 12 13 14 15 16 17 18 19 20 21 22 23 24 25 26 27 28 29 30 31 32 33 34 35 36 37 38 39 40 41 42 43 44 45 46 47 48 49 50 <?xml version="1.0" encoding="UTF-8"?> <project xmlns ="http://maven.apache.org/POM/4.0.0" xmlns:xsi ="http://www.w3.org/2001/XMLSchema-instance" xsi:schemaLocation ="http://maven.apache.org/POM/4.0.0 http://maven.apache.org/xsd/maven-4.0.0.xsd" > <modelVersion > 4.0.0</modelVersion > <groupId > cn.itcast.service</groupId > <artifactId > itcast-service-consumer</artifactId > <version > 0.0.1-SNAPSHOT</version > <packaging > jar</packaging > <name > itcast-service-consumer</name > <description > Demo project for Spring Boot</description > <parent > <groupId > org.springframework.boot</groupId > <artifactId > spring-boot-starter-parent</artifactId > <version > 2.0.4.RELEASE</version > <relativePath /> </parent > <properties > <project.build.sourceEncoding > UTF-8</project.build.sourceEncoding > <project.reporting.outputEncoding > UTF-8</project.reporting.outputEncoding > <java.version > 1.8</java.version > </properties > <dependencies > <dependency > <groupId > org.springframework.boot</groupId > <artifactId > spring-boot-starter-web</artifactId > </dependency > <dependency > <groupId > org.springframework.boot</groupId > <artifactId > spring-boot-starter-test</artifactId > <scope > test</scope > </dependency > </dependencies > <build > <plugins > <plugin > <groupId > org.springframework.boot</groupId > <artifactId > spring-boot-maven-plugin</artifactId > </plugin > </plugins > </build > </project >
1.2.2.编写代码
首先在引导类中注册RestTemplate:
1 2 3 4 5 6 7 8 9 10 11 12 @SpringBootApplication public class ItcastServiceConsumerApplication @Bean public RestTemplate restTemplate () return new RestTemplate(); } public static void main (String[] args) SpringApplication.run(ItcastServiceConsumerApplication.class , args ) ; } }
编写配置(application.yml):
编写UserController:
1 2 3 4 5 6 7 8 9 10 11 12 13 14 15 @Controller @RequestMapping ("consumer/user" )public class UserController @Autowired private RestTemplate restTemplate; @GetMapping @ResponseBody public User queryUserById (@RequestParam("id" ) Long id) User user = this .restTemplate.getForObject("http://localhost:8081/user/" + id, User.class ) ; return user; } }
pojo对象(User):
1 2 3 4 5 6 7 8 9 10 11 12 13 14 15 16 17 18 19 20 21 22 23 24 25 26 27 28 29 30 31 32 33 34 35 36 37 38 39 40 41 42 43 44 45 46 47 48 49 50 51 52 53 54 55 56 57 58 59 60 61 62 63 64 65 66 67 68 69 70 71 72 73 74 75 76 77 78 79 80 81 82 83 84 85 86 87 88 89 90 91 92 93 94 95 96 97 98 99 100 101 102 public class User implements Serializable private static final long serialVersionUID = 1L ; private Long id; private String userName; private String password; private String name; private Integer age; private Integer sex; private Date birthday; private Date created; private Date updated; public Long getId () return id; } public void setId (Long id) this .id = id; } public String getUserName () return userName; } public void setUserName (String userName) this .userName = userName; } public String getPassword () return password; } public void setPassword (String password) this .password = password; } public String getName () return name; } public void setName (String name) this .name = name; } public Integer getAge () return age; } public void setAge (Integer age) this .age = age; } public Integer getSex () return sex; } public void setSex (Integer sex) this .sex = sex; } public Date getBirthday () return birthday; } public void setBirthday (Date birthday) this .birthday = birthday; } public Date getCreated () return created; } public void setCreated (Date created) this .created = created; } public Date getUpdated () return updated; } public void setUpdated (Date updated) this .updated = updated; } }
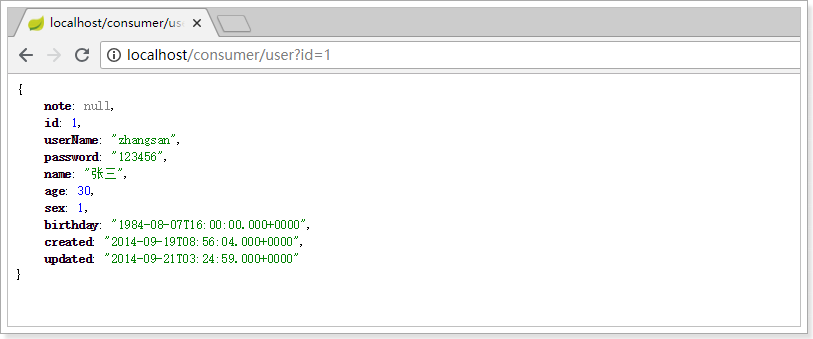
1.2.3.启动测试 因为我们没有配置端口,那么默认就是8080,我们访问:http://localhost/consumer/user?id=1
一个简单的远程服务调用案例就实现了。
1.3.有没有问题? 简单回顾一下,刚才我们写了什么:
itcast-service-provider:一个提供根据id查询用户的微服务。
itcast-service-consumer:一个服务调用者,通过RestTemplate远程调用itcast-service-provider。
存在什么问题?
在consumer中,我们把url地址硬编码到了代码中,不方便后期维护
consumer需要记忆provider的地址,如果出现变更,可能得不到通知,地址将失效
consumer不清楚provider的状态,服务宕机也不知道
provider只有1台服务,不具备高可用性
即便provider形成集群,consumer还需自己实现负载均衡
其实上面说的问题,概括一下就是分布式服务必然要面临的问题:
服务管理
如何自动注册和发现
如何实现状态监管
如何实现动态路由
服务如何实现负载均衡
服务如何解决容灾问题
服务如何实现统一配置
以上的问题,我们都将在SpringCloud中得到答案。
